During Episode 25 of Shooting The Breeze, I spent several minutes talking about Episode 55 of The Power Factor Show . Towards the end of the show, the guys informed their audience that they were looking for some stage design submission to critique in a future episode.
I’ve been wanting to try my hand at USPSA Stage Design for a little while now and the prospect of having it reviewed finally made me get started. In the past I’ve tried using the Powerpoint Template that is so popular amongst USPSA stage designs, but I just couldn’t get my head around it (Maybe my lack of Powerpoint and using a Macbook has something to do with it).
In order to design my stage, I made it much more complicated than it had to be. I fired up AutoCAD and got to work, from scratch, in a 3D Environment.It has been a few years since I’ve done anything more than dabbling in 3D, so it took me a little while to find my groove.
After I was finished, I packaged it up and sent it away to The Power Factor Show . I received a positive response from Steve telling me that there were no glaring holes in my plan and that it had plenty of options for the shooter. Steve also mentioned that the use of Shooting Boxes would limit the stage to Level 1 matches only (club level matches) and that I had some room to place extra targets if I wanted to increase the round count a bit.
This gave me an idea. I thought, why don’t I present the stage to the readers of my blog and we can work on it as a collective? After some work on the stage, maybe we can even get it used at a club level match and record some video of it being shot.
USPSA Community Stage: 001
Stage Description:
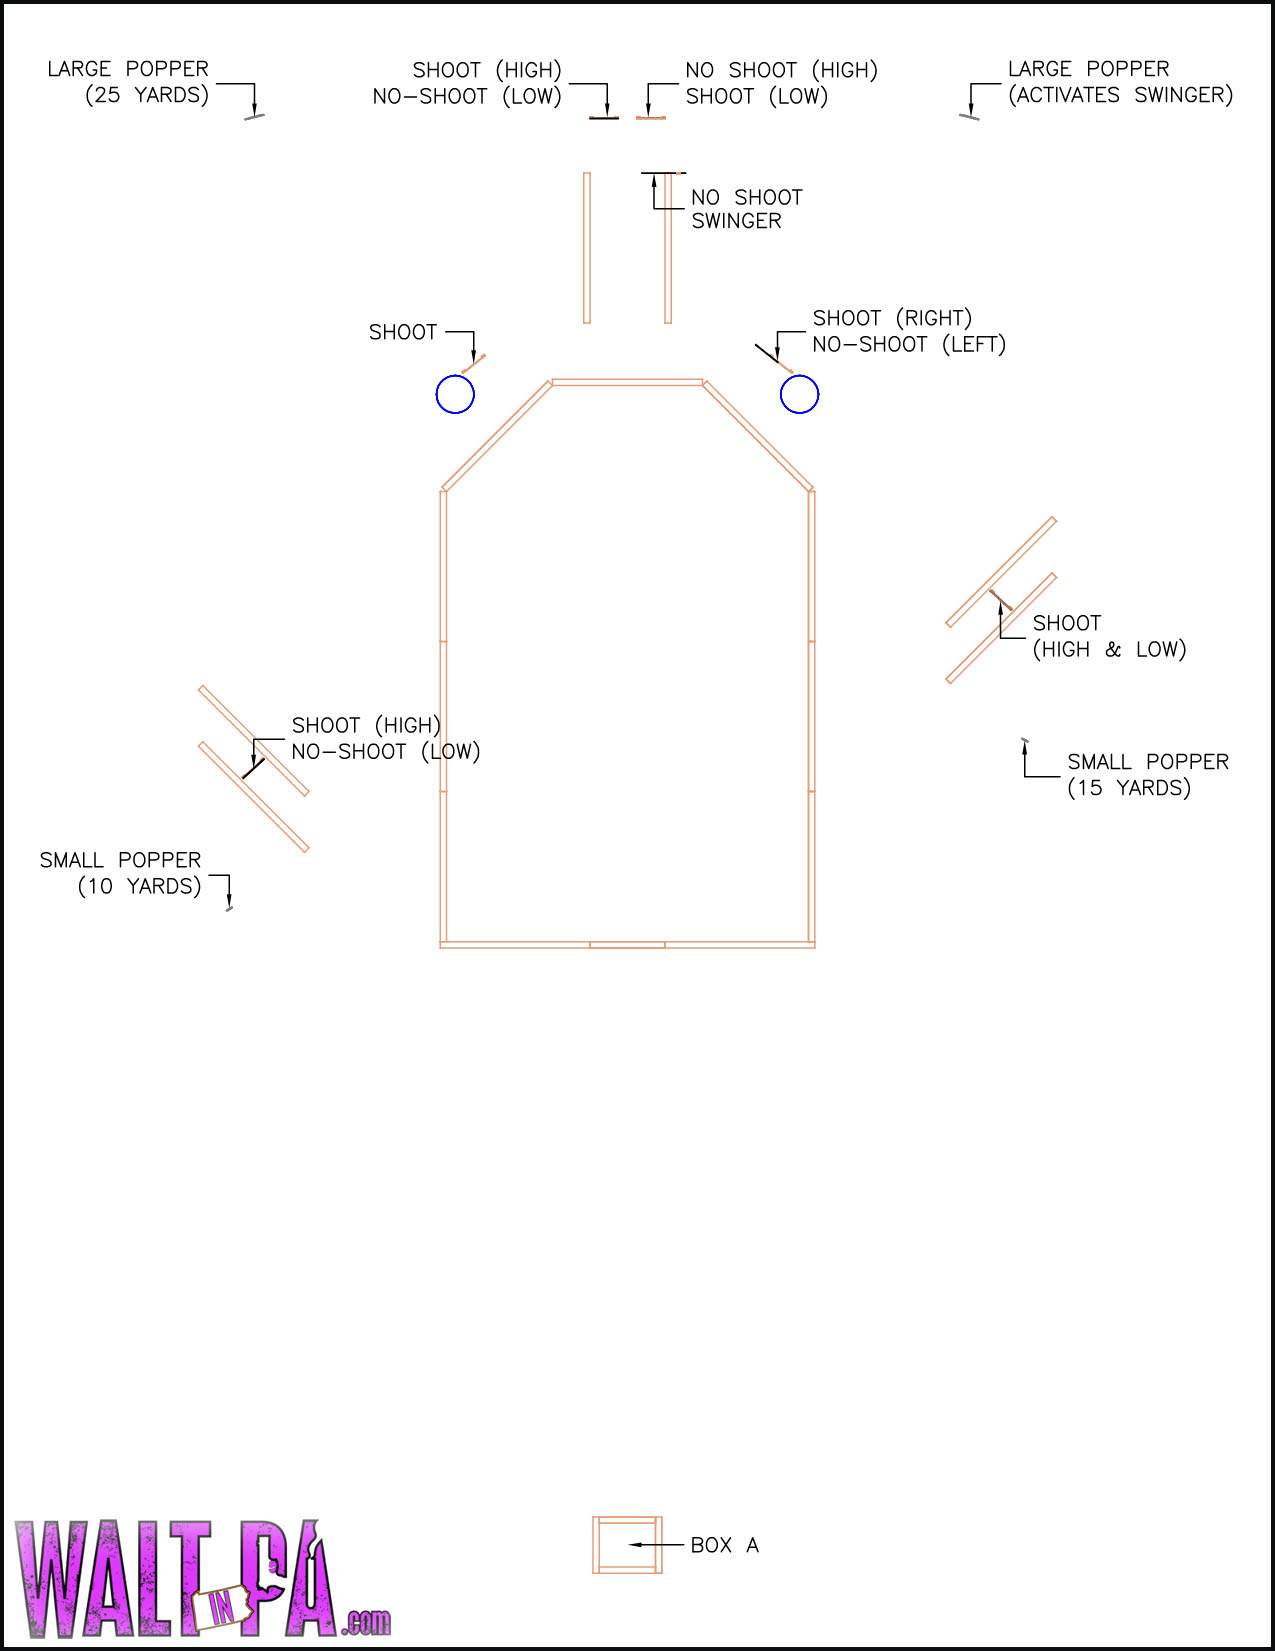
From Box A, shooter is to engage all steel targets. Once all steel is down, shooter may then procede into forward shooting zone and engage paper with two best shots scoring.

Stage Layout:
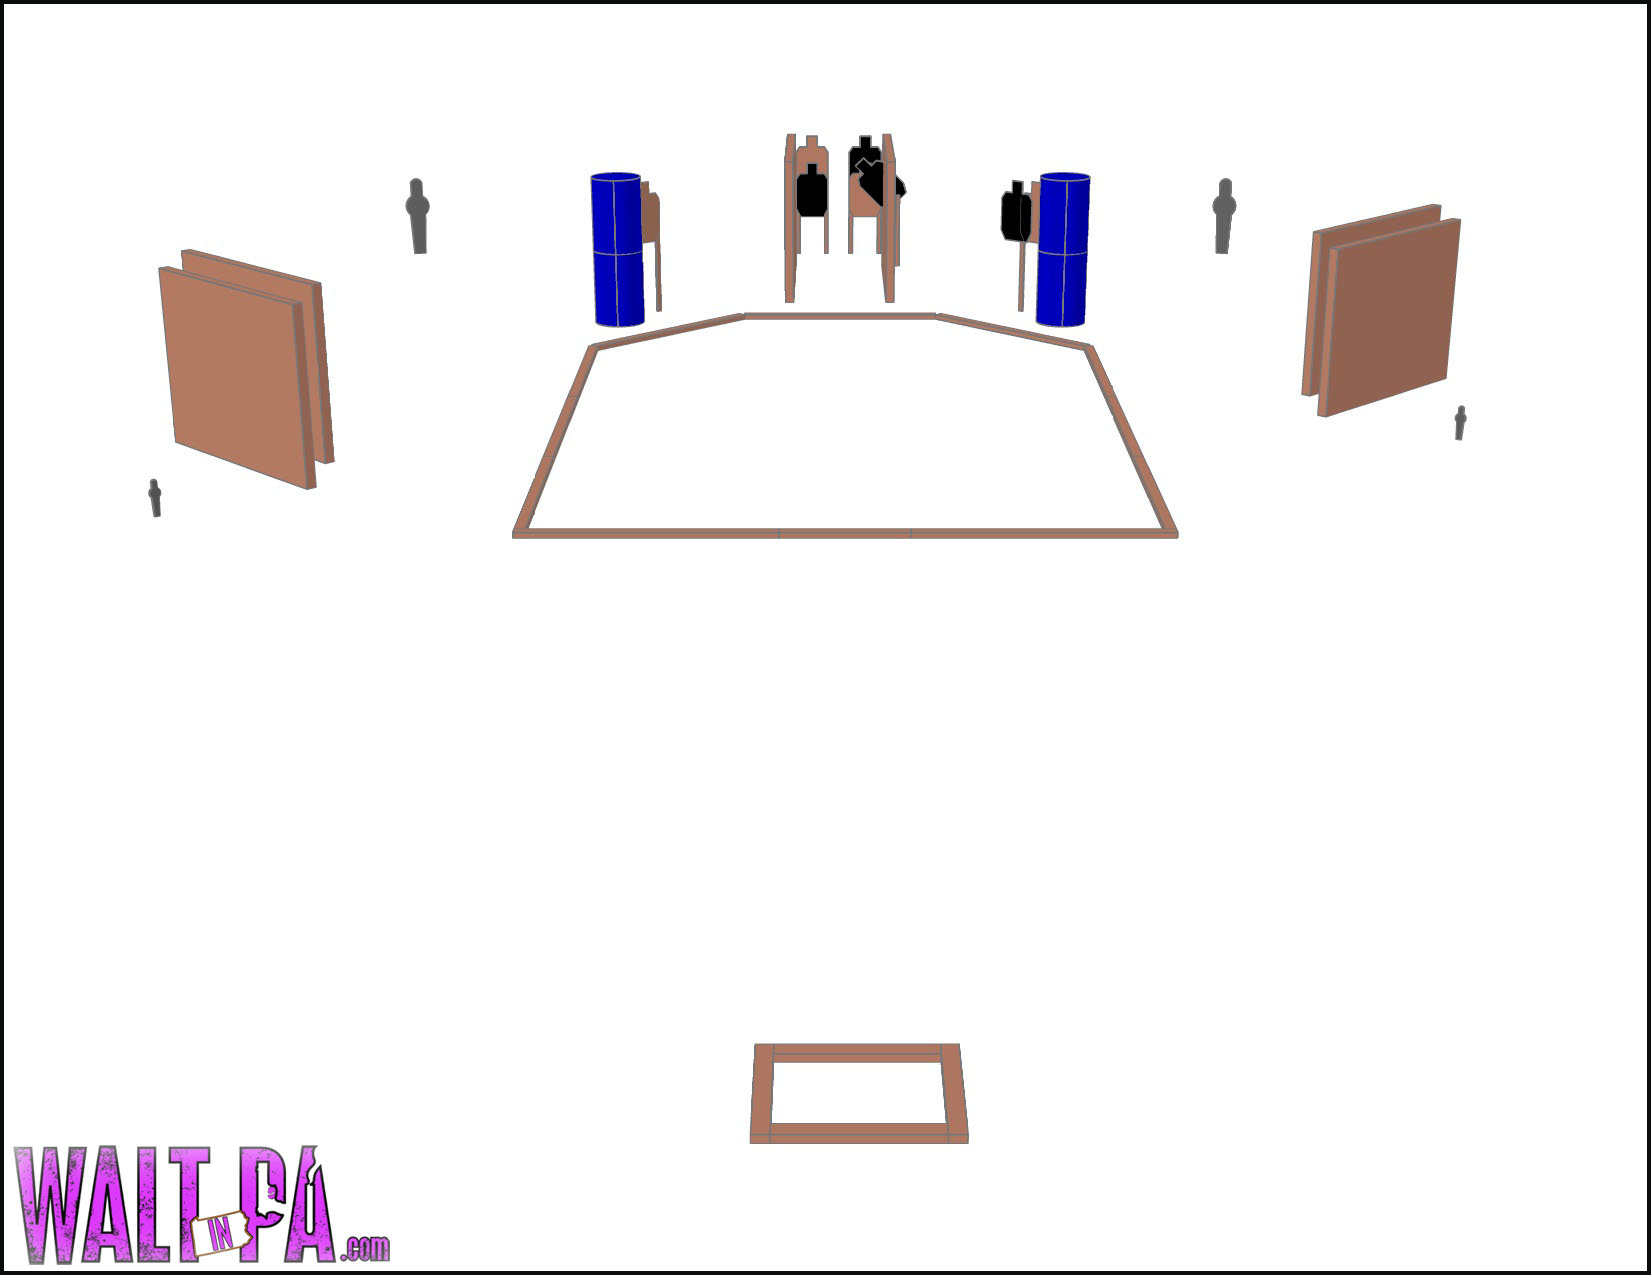
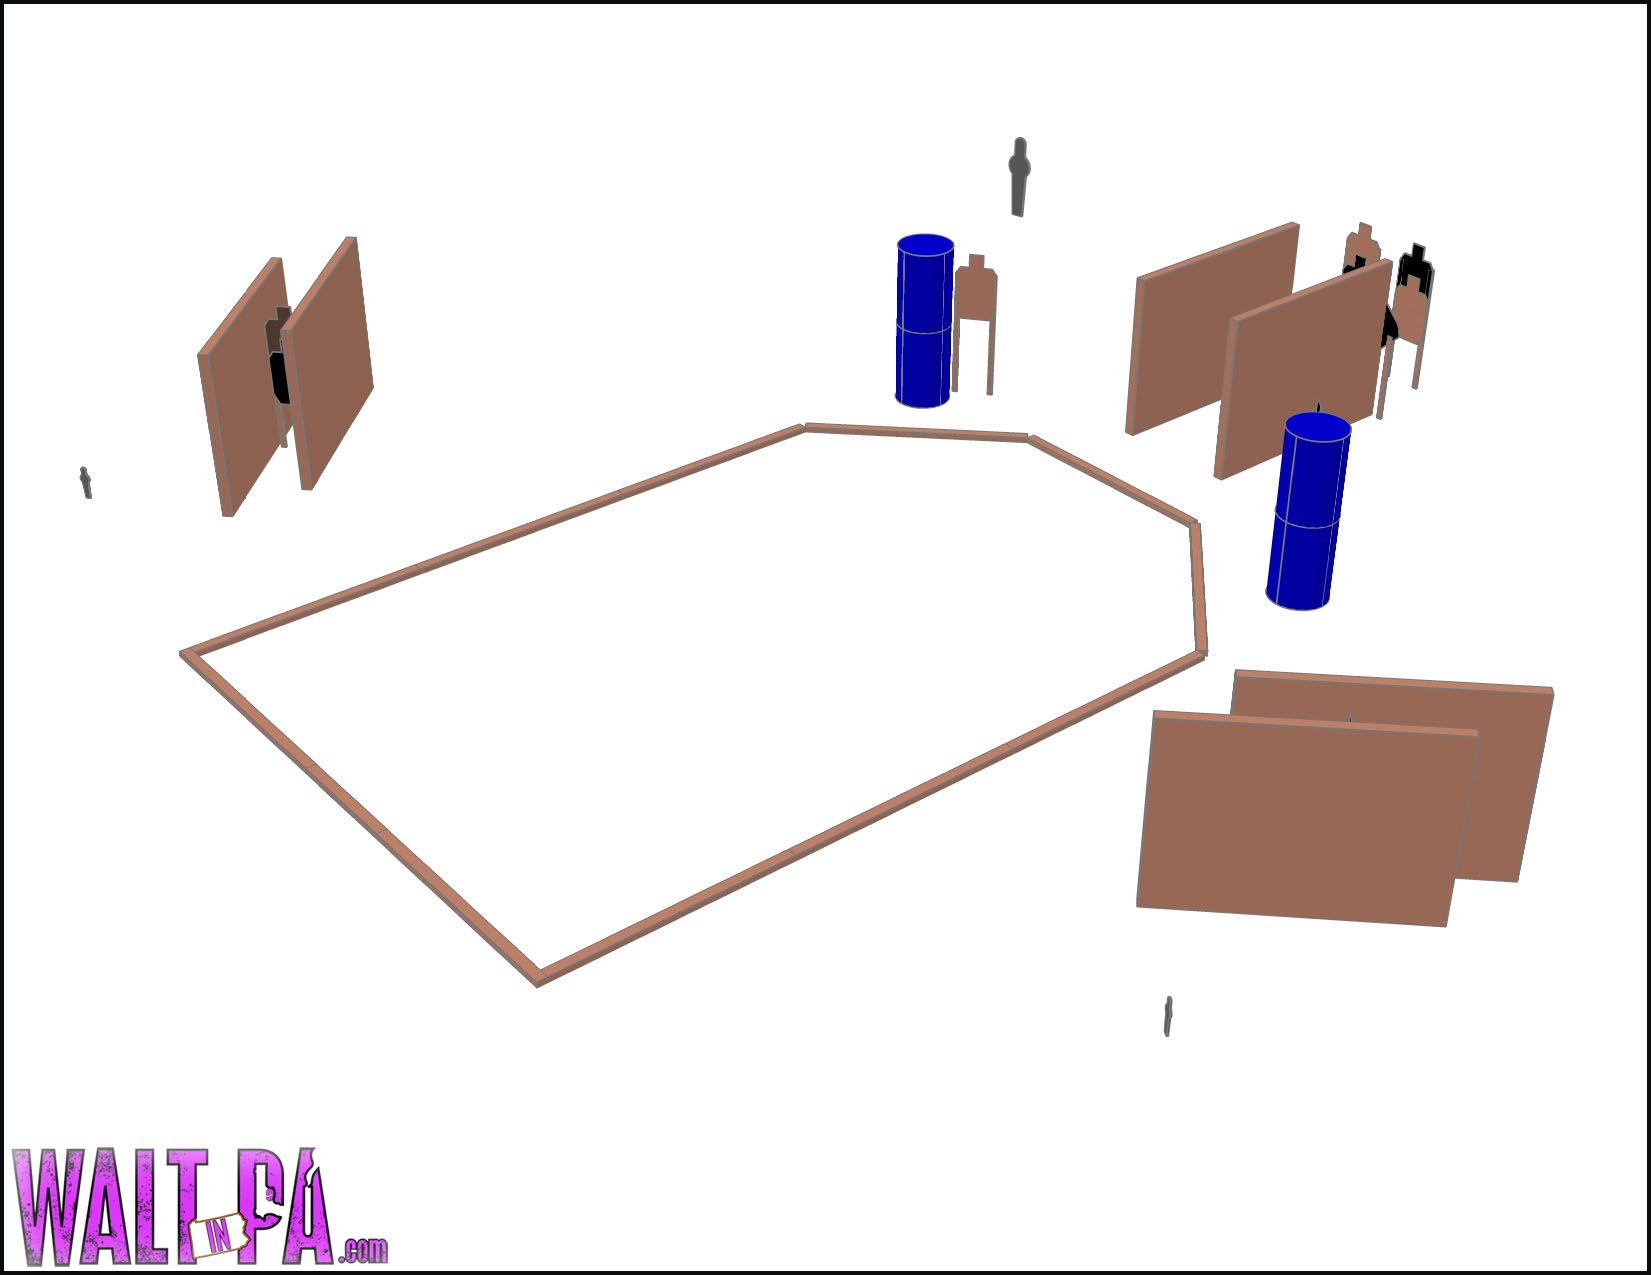
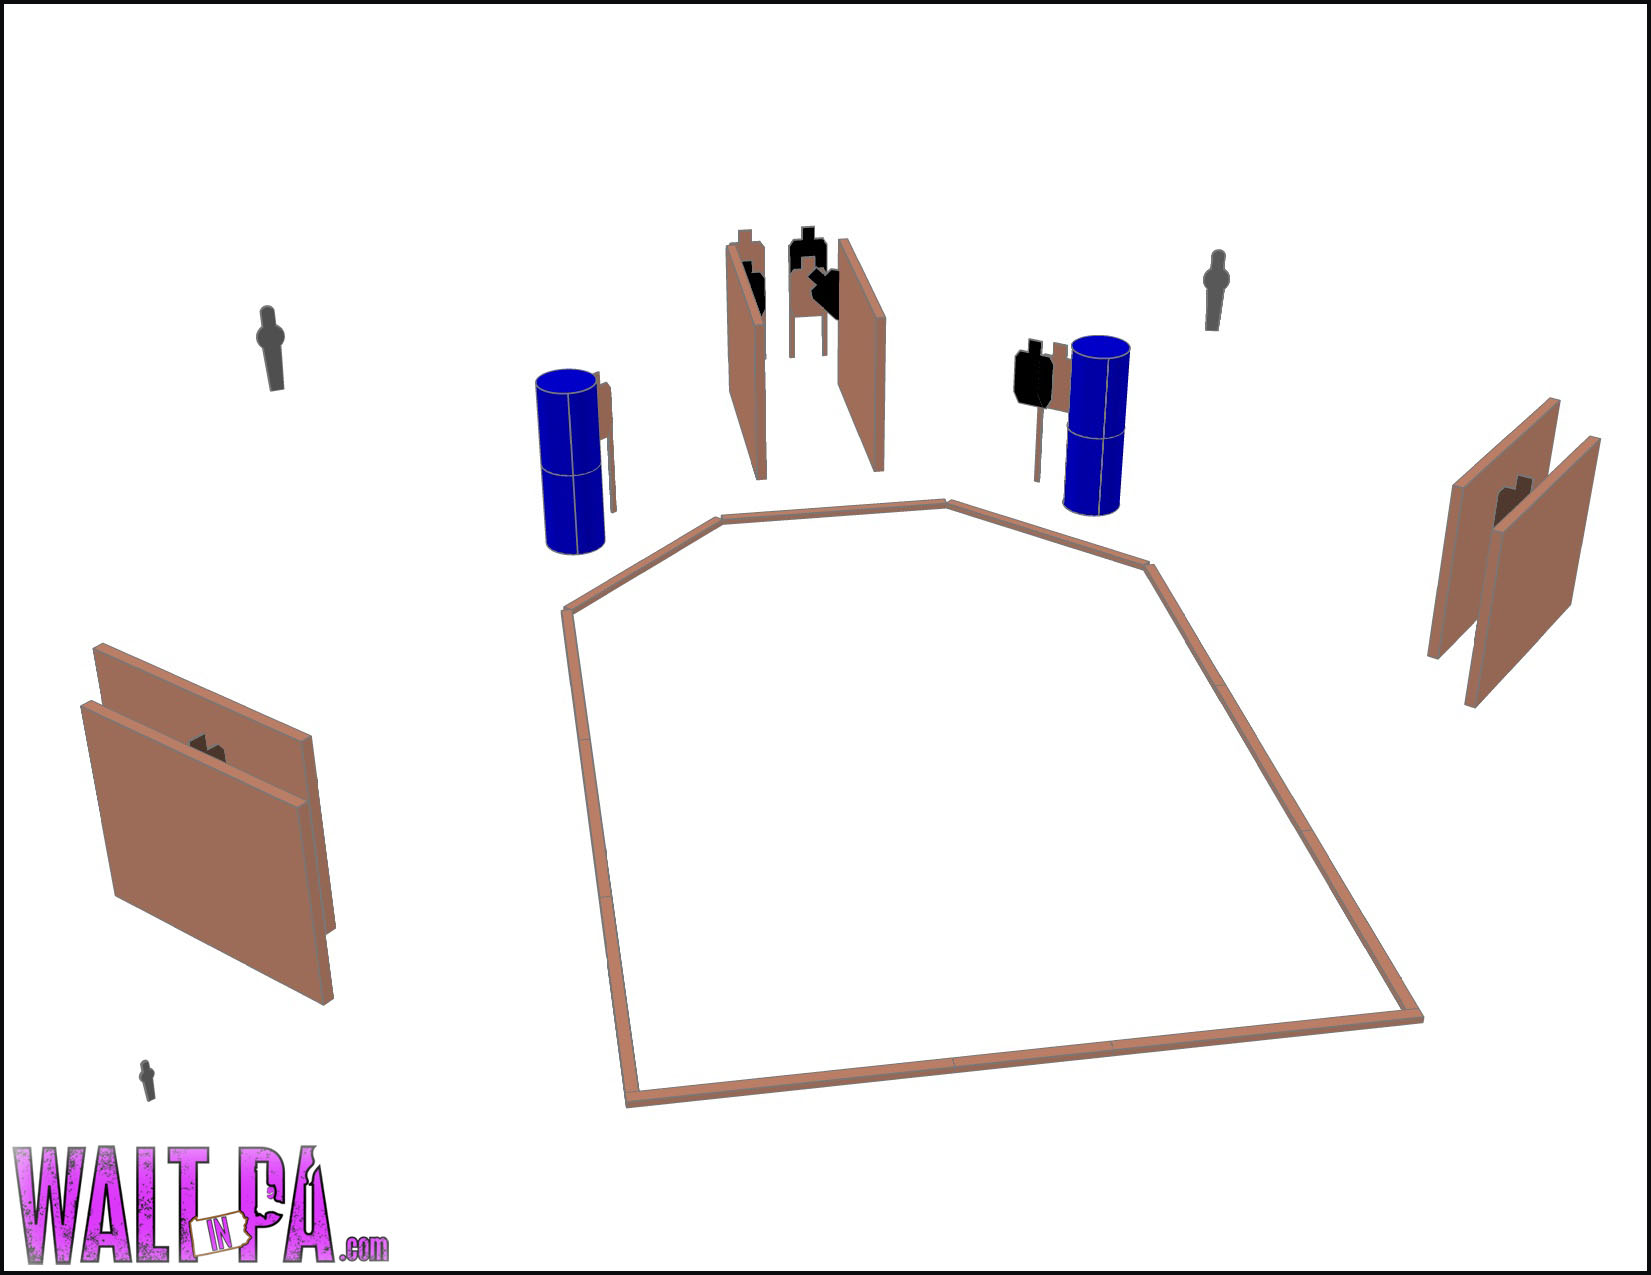
From Box A, the shooter is to engage four steel poppers. Steel may be shot in any order the shooter prefers. The closest piece of steel, on the left, is a small popper at 10 Yards. The next piece of steel is placed 15 yards from Box A, on the right. Steel targets three and four are large poppers placed 25 yards from Box A. The 25 yard popper on the right is setup to activate a no-shoot swinger.
From within the large shooting zone, the shooter is to engage a variety of paper targets. The first is a series of stacked targets placed between two walls. These walls restrict the shooters visibility and draws the shooter in to make closer shots. A similar setup occurs on the opposite side of the shooting zone.
Barrels are setup towards the rear of the stage with targets tucked around behind them. Beyond these targets is a narrow shooting lane with two target stands at the rear. The target stand on the right is shrouded by a no-shoot swinger than was activated earlier on in the stage.


Participating in Development
If you would like to help develope this USPSA stage, you can do it in a couple of ways. The easiest is probably to leave comment on this post with your suggestions. If you would like to take it a step further, you could save or print the above images and mark them up. If you send the revised images to me, I’ll upload them and host them here on my blog (you can use any image editing software to draw on them. You could even print them off, scribble on them, then scan or snap a photo of your markups).
Every so often I’ll go through the suggestions, alter the original file, and repost the stage. We can go through the process until the stage is deemed complete. Once we get to that point, I’ll do my best to create the official USPSA Stage Paperwork and submit it to my local club for inclusion in a match (you are welcome to do the same with the completed stage).
Shooting The Stage
If stage design isn’t your thing, I would still appreciate your input. Instead of offering ideas to alter the stage, tell me how you would shoot it. If you have no experience with USPSA shooting, limit your gun to ten rounds and consider yourself a Production or Limited 10 Shooter.
4 thoughts on “USPSA Stage: Community Developed”
Comments are closed.
Recent Posts
Finding Joy in Unexpected Places: A Memorable Motorcycle Ride to Remember
As we roll into 2025, I've been reflecting on the rides that made 2024 special. While the year didn't provide as many opportunities to hit the road as I'd hoped, one particular adventure stands out...
After months of silence on the YouTube channel, it's finally time to fire up the MT-09 and get back to what we love - creating motorcycle content and building our riding community. But before we dive...

Hmmm…where exactly is the Stinky Cigar Ashtray Herf Edition in that diagram? LOL
Jerry,
That reminds me. I need to find a cigar clip that I can attach to my range bag somehow. There is never a place to set down my cigar and a Herf Edition Stinky might be a bit much… LOL
It’s a good thing you guy’s are friends, some one would think other wise. Great come back Walt!
I hate to sound like a dick but I think ( I could be wrong ) you made an illegal stage , if you shoot the no shoot and the bullet passes through and hits the target behind it , it would be considered range equipment malfunction and a reshoot would be mandatory. I don’t mean to put you down but what I learned about stage design according to USPSA makes me not even want to think about it. To make a legal and usable stage takes alot more then you think , you can’t just jump into it , they might offer a stage design course again and in my RO course they touched on it alittle , but south chester had a range design course last year and might have another. I am by no means trying to put you down at all , just what you’ve seen at alot of local matches is much more laxed and loose then level II or above. When I took the RO course it opened my eyes to how much I didn’t know and how many were doing it wrong. The rule book may not be big but everything in it is an absolute.